Installation and setup
Option 1: Using the Release version (Recommended)
First, the Java environment has to be set. For Linux it can be installed with the following command:
sudo apt-get install openjdk-19-jre
Then Eclipse can be installed. Please download the installer from the official Eclipse website. After unpacking the downloaded file, the installer can be run by calling the command ./eclipse-inst from the console.
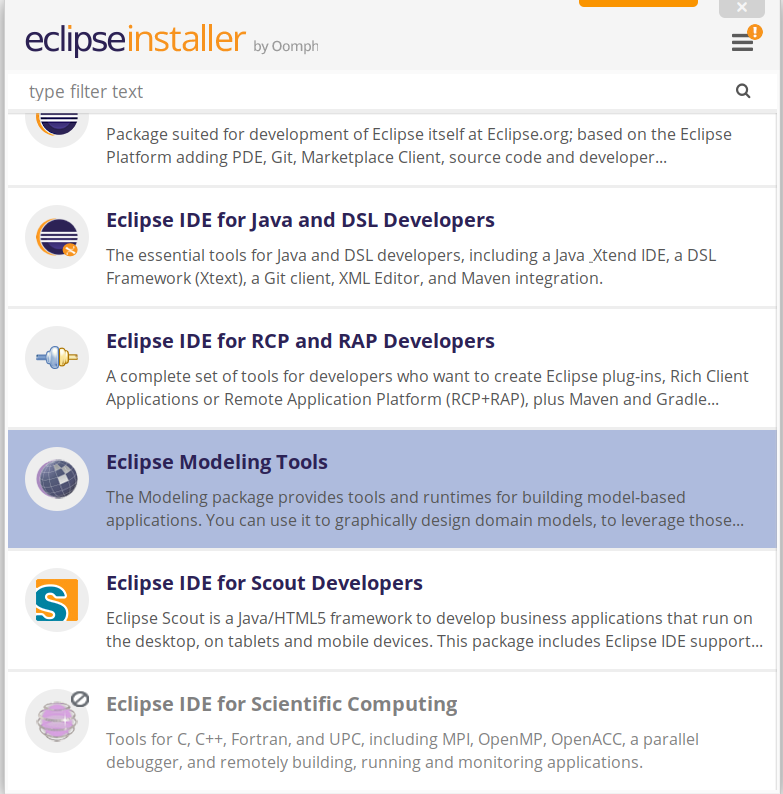
Once you start the installer, select the package “Eclipse Modeling Tools”. You can find it just by scrolling or using the searching tool:
Press next, and then pick the Java version 19 and the folder where you would like to install Eclipse.
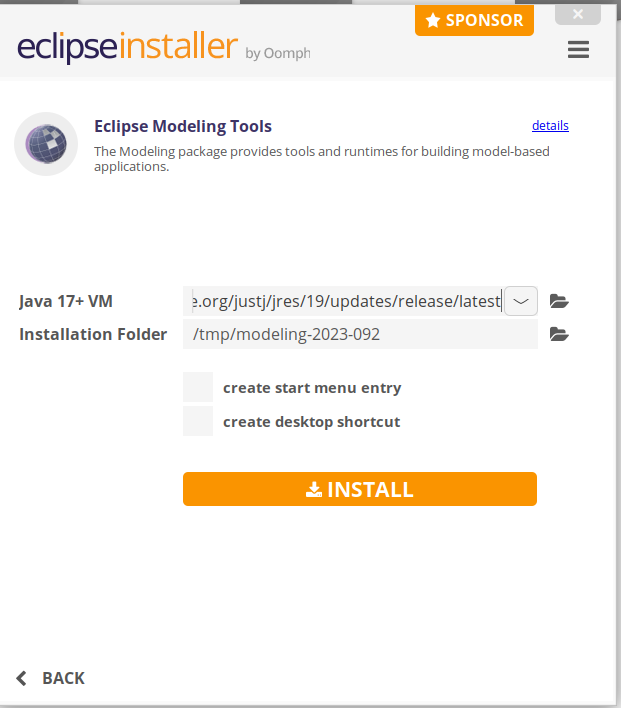
Continue the installation, accepting the license, as usual.
Once the installation is completed, go to Help > Install New Software…. To install the latest version of the ROS tooling, add the update site URL https://raw.githubusercontent.com/ipa320/RosTooling-update-site/main in the Work with section.
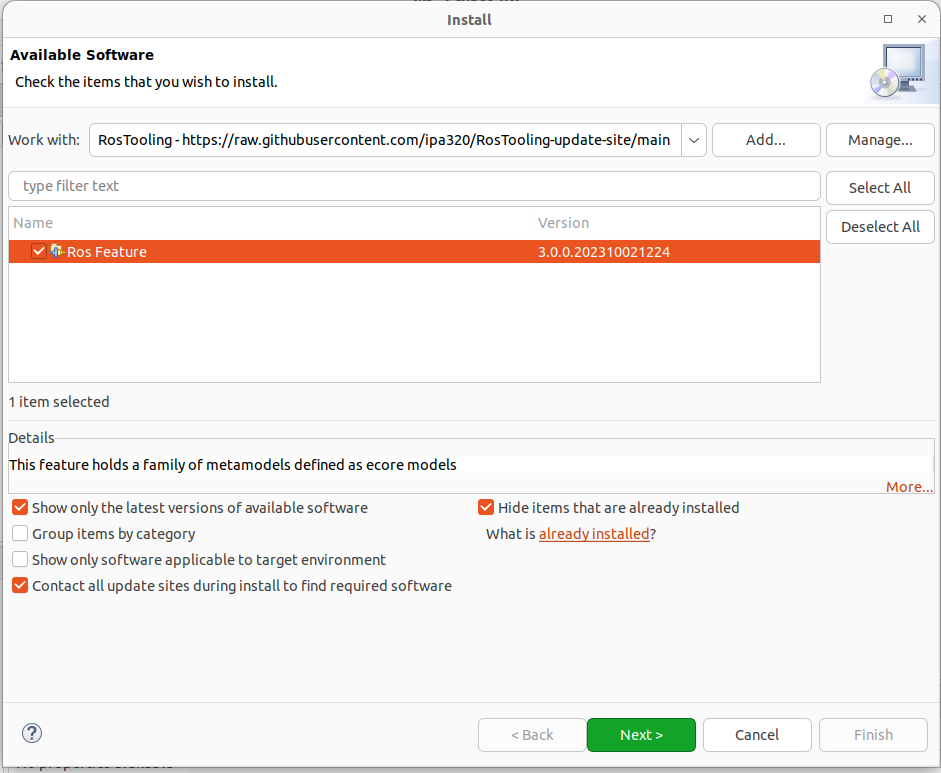
If no package is listed, please uncheck the option Group items by category. The category ROS Model appears in the Name area. Check the box in front of ROS model and click Next to review the list of items to be installed. Click Next again to read and accept the terms of the license agreements and afterwards click Finish. Eclipse will then start to install the ROS tooling and its dependencies. If you get a security warning about the authenticity, click OK. Finally, when asked, restart Eclipse to complete the installation process.
To start using the ROS tooling continue with step 1
Alternative installations
Option 2: Using the Eclipse Installer - Source installation (ROS tooling developers)
First, the Java environment has to be set:
sudo apt-get install openjdk-19-jre
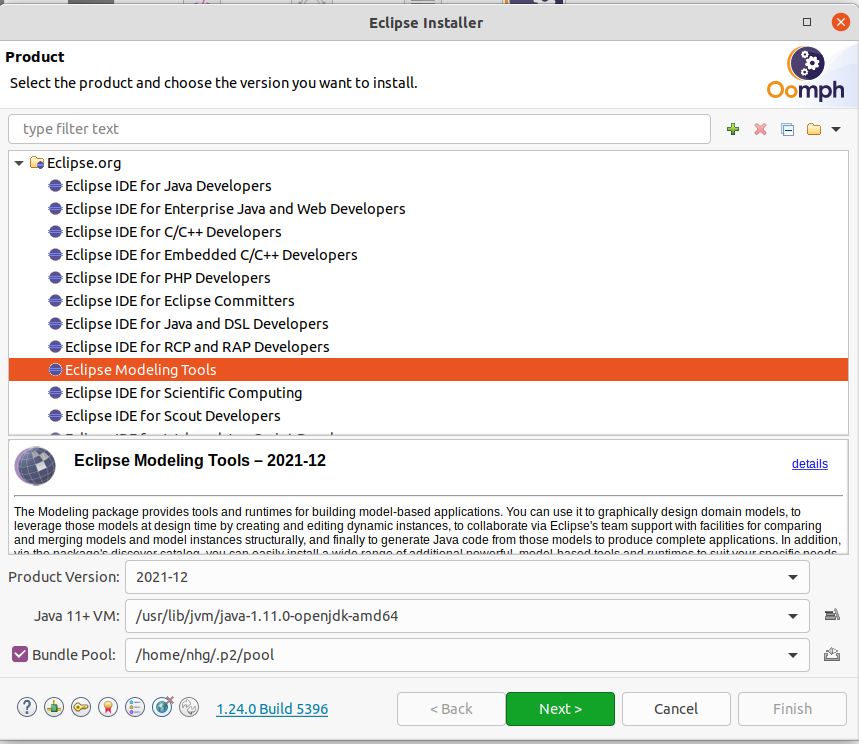
Download the official Eclipse Installer for your preferred operating system. Execute the installer and choose the advanced mode (menu on the right-up corner). Select the Product Eclipse Modeling tools package. And then pick the Java version 19.
Press Next and add a new User project by pressing the green button +:
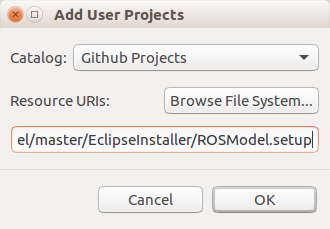
Catalog: Github Projects
Resource URIs: https://raw.githubusercontent.com/ipa320/RosTooling/main/EclipseInstaller/ROSModel.setup
Sometimes Eclipse is not able to find the file, for those cases, we recommend downloading the file to the local memory of the machine and importing it:
wget https://raw.githubusercontent.com/ipa320/RosTooling/main/EclipseInstaller/ROSModel.setup
Select the ROS Model project (under GitHub Projects ->
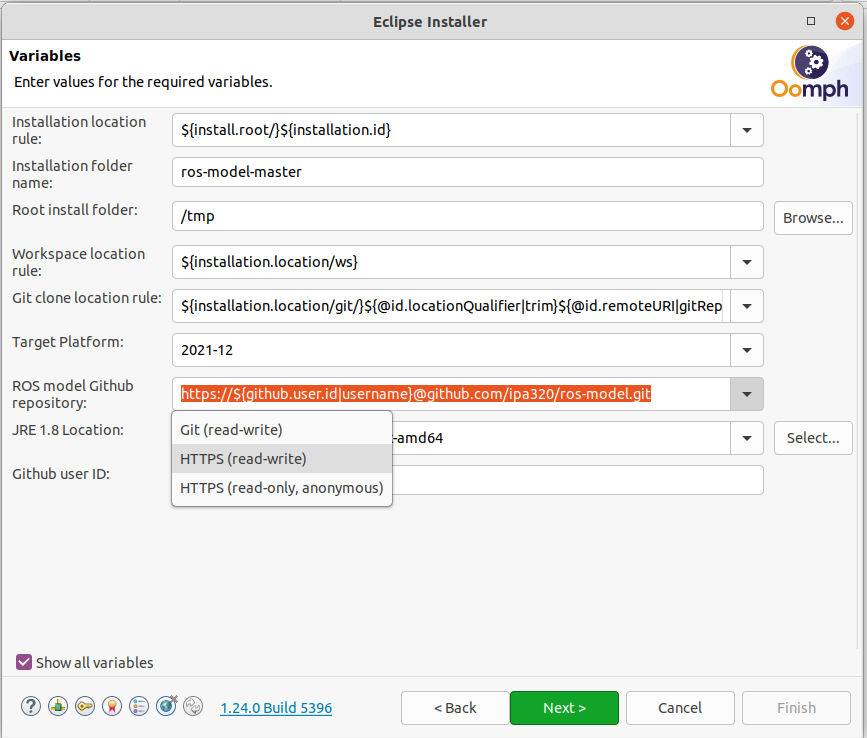
By default, the ROS tooling installation will be saved under the folder ros-model-master in your home directory. To ensure that you have access to get the source code from GitHub, select the check box Show all variable and change the Ros model GitHub repository to the HTTPs(read-write) option, verify that the option Github user ID is set to “anonymous”.
Follow the installation instructions of the Oompth installer dialog, after the installation eclipse will be restarted to launch the ROS tooling configuration. Finally, when all the startup tasks are finished press “Workbench”.
To start using the ROS tooling continue with step 0