Review models and the use of the textual editors for Ros Systems
To complete this tutorial the project “de.fraunhofer.ipa.ros.communication.objects” must be imported. See instructions under setup. If the automatic clone doesn’t work for you, please clone the repository RosCommonObjects manually and import it to your Eclipse workspace.
The first step is to create a new Project to contain the examples, in case you completed the previous tutorials you can just use the same package. Otherwise, as usual you can create a new project by pressing the icon “Add new ROS Project”.
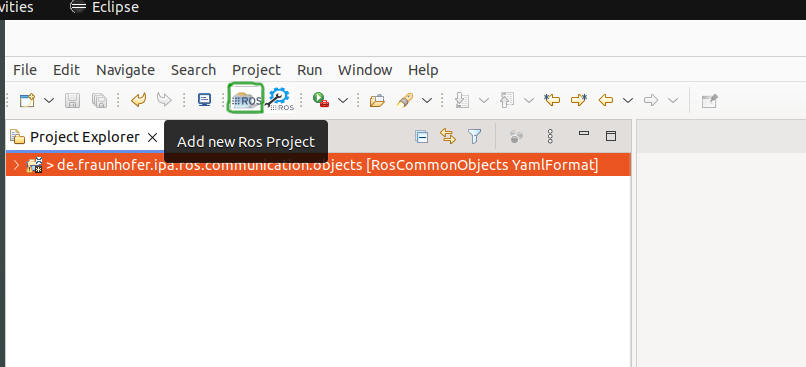
If the button doesn’t work you can also create it manually using the Eclipse menu File -> New -> Other.. and searching for “Ros Model Project”.

By default, a new project with a reference to the content of the “de.fraunhofer.ipa.ros.communication.objects” will be created. This new project contains a folder called “rosnodes” to hold the nodes description and a file with the extension .ros2 which will have an error because it is empty. The folder “rosnodes” can be removed for this example.
As a system creation requires component models, you can use existing .ros2 files for the composition. Under “de.fraunhofer.ipa.ros.communication.objects/BasicSpecs/Components” you can find the ros_component_template.ros2 and the ros_component2_template.ros2 files. Both represent fictitious nodes with all the possible interfaces and parameters. Please open both files and take a look at them.
Now we have to create a file to contain our system model. For that, you can go to File -> New -> Other -> General -> File. The new file must have the extension .rossystem.
As reference, in RosSystem description we explain the format of a system and the editor will support you in writing the model properly.
The first that must be given is a name and then a “:” is required. In the next line, you must add indentation and you can press the keys “Ctrl” + Space bar for help. Then we will define the nodes that compose the system. Here under “from” we will link the previous referenced nodes, the grammar for the references is PackageName.NodeName.
So far our file looks like this:
my_awesome_system:
  nodes:
    node1:
      from: "my_awesome_pkg.awesome_node"
    node2:
      from: "my_awesome2_pkg.awesome2_node"
This model is basically creating a system composed of two nodes. While saving the model automatically a folder “src-gen” will be created. The folder contains a new ROS package whose structure corresponds to a python launch package.
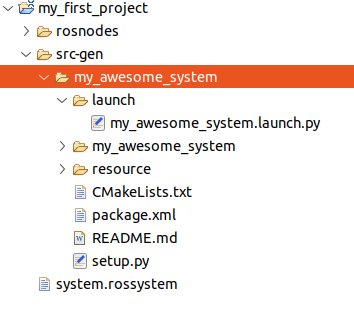
The CMakeLists.txt and package.xml list the required dependencies and tags to compile the package. Then under launch the python file starts both nodes. See the Code generator review tutorial for further details.
Now, we want to expose the ports to be connected. For that, we have to define the interfaces under the nodes. And again we have to reference the created interfaces, with the grammar NodeName::InterfaceName. Although in ROS all the interfaces will be automatically exposed, the RosSystem model requires this step to clearly design the system and the ports that are intentionally opened by the architect of the system.
my_awesome_system:
  nodes:
    node1:
      from: "my_awesome_pkg.awesome_node"
      interfaces:
        - my_pub: pub-> "awesome::awesome_pub"
    node2:
      from: "my_awesome2_pkg.awesome2_node"
      interfaces:
        - my_sub: sub-> "awesome2::awesome2_sub"
The next step is to create a connection between the two components. For that, we will use the connections attribute, under the system description. The connections must be made between interface instances described within the models, otherwise, the model validator will give an error.
Currently, our model looks like this:
my_awesome_system:
  nodes:
    node1:
      from: "my_awesome_pkg.awesome_node"
      interfaces:
        - my_pub: pub-> "awesome::awesome_pub"
    node2:
      from: "my_awesome2_pkg.awesome2_node"
      interfaces:
        - my_sub: sub-> "awesome2::awesome2_sub"
  connections:
   - [ my_pub, my_sub ]
We invite you to try different combinations and debug the validator for connections. For example:
my_awesome_system:
  nodes:
    node1:
      from: "my_awesome_pkg.awesome_node"
      interfaces:
        - my_pub: pub-> "awesome::awesome_pub"
        - string_pub: pub-> "awesome::hello_world_pub"
    node2:
      from: "my_awesome2_pkg.awesome2_node"
      interfaces:
        - my_sub: sub-> "awesome2::awesome2_sub"

  connections:
   - [string_pub, my_sub]
This file will give a compilation error, and therefore the launch file will not be generated, because you are trying to connect ports with a different message type. The same will happen in case we try to connect different types of ports, like a topic with a service.
Also, another attribute that can be set and the generator will take into account is the namespace:
Lastly, we can check the set of parameter values. A valid example of this would be:
my_awesome_system:
  nodes:
    node1:
      from: "my_awesome_pkg.awesome_node"
      namespace: "my_ns"
      interfaces:
        - my_pub: pub-> "awesome::awesome_pub"
    node2:
      from: "my_awesome2_pkg.awesome2_node"
      interfaces:
        - my_sub: sub-> "awesome2::awesome2_sub"
      parameters:
        - string_example: "awesome2::awesome2_string_param"
          value: "hello"
  connections:
   - [ my_pub, my_sub ]
Where we give a string value to the parameter “awesome2_string_param”. In case we try to give a wrong value, for example:
my_awesome_system:
  nodes:
    node1:
      from: "my_awesome_pkg.awesome_node"
      namespace: "my_ns"
      interfaces:
        - my_pub: pub-> "awesome::awesome_pub"
    node2:
      from: "my_awesome2_pkg.awesome2_node"
      interfaces:
        - my_sub: sub-> "awesome2::awesome2_sub"
      parameters:
        - string_example: "awesome2::awesome2_string_param"
          value: 5
  connections:
   - [ my_pub, my_sub ]
The compiler will give an error of mismatched type.
 The validator has some parts not fully implemented, check the Known issues site in case you have problems by following this tutorial.
Another feature included as part of the code generator is the generator of parameter files. This will be automatically done and the launch file will by default load it by the set of more than 5 parameters, for example for this case:
my_awesome_system:
  nodes:
    node1:
      from: "my_awesome_pkg.awesome_node"
      namespace: "my_ns"
      interfaces:
        - my_pub: pub-> "awesome::awesome_pub"
    node2:
      from: "my_awesome2_pkg.awesome2_node"
      interfaces:
        - my_sub: sub-> "awesome2::awesome2_sub"
      parameters:
        - array_example: "awesome::awesome_array_param"
          value: ["hello", "hallo"]
        - bool_example: "awesome::awesome_bool_param"
          value: true
        - double_example: "awesome::awesome_double_param"
          value: 1.2
        - integer_example : "awesome::awesome_integer_param"
          value: 2
        - string_param : "awesome::awesome_string_param"
          value: "hallo"
        - struct_param: "awesome::awesome_struct_param"
          value: [
            first: 2
            second: true]
  connections:
   - [ my_pub, my_sub ]
In this case, a new file will be created under “src-gen/PackageName/config/” and it will contain the configuration of the node2. The launch file will be adapted to launch the configuration from a file.
With this very basic example, we hope you have understood how the models can be used and what kind of attributes they allow to represent.